
Introduction
Nowadays it is quite easy to implement Ethernet relay control of devices connected to a 10/100 network. An Ethernet relay board connects to the ethernet port of your local network hub, allowing controlled switching from anywhere on the network.
Requirements
– Blackberry Playbook
– 12V@500mA power supply
– ETH-RLY02 board

Overview
The ETH-RLY02 provides two volt free contact relay outputs with a current rating of up to 16Amp each. The module is powered from a 12vdc supply which can be regulated or unregulated. The DC input jack is 2.1mm with positive core polarity, DC supplies are required to supply at least 500mA at 12vdc. The relays are SPCO (Single Pole Change Over) types. The normally open, normally closed and common pins are all available on the screw terminals.
Testing the ETH-RLY02 board
Having plugged in your 12vdc power supply and Ethernet connection, start up your Web browser and type http://ethrly02 into the address bar, please note this only works in Windows. You will be prompted for a password as shown below. User name is ‘admin’ and password is ‘password’ (you can change later the password):

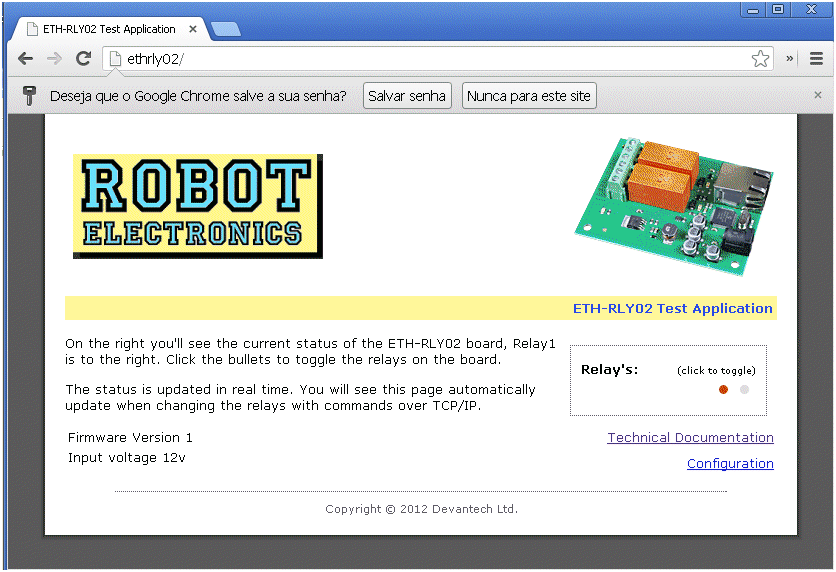
You will be greeted with the following page:

You can immediately test the board. Switch the relays ON and OFF by clicking the relay buttons (the red/gray circles). You can hear the click of relay switching ON or OFF. The following image shows that Relay1 has been switched ON:
This page also contains a link to Technical Documentation page and to Configuration. Click Configuration link, and you will see the following page:

Take note of board’s IP (here in my example is 192.168.1.82) and Port number (here is 17494). You will need these values in following next steps.
Installing the Playbook App
Our Playbook App is based on Android App. You can download the Playbook App from Bitbucket, an unlimited free private repositories’ site. I have converted the available app fron Android apk to Playbook bar.
You will need to sideload this App in your Playbook. For doing that, you need to enable Development Mode in your Playbook.
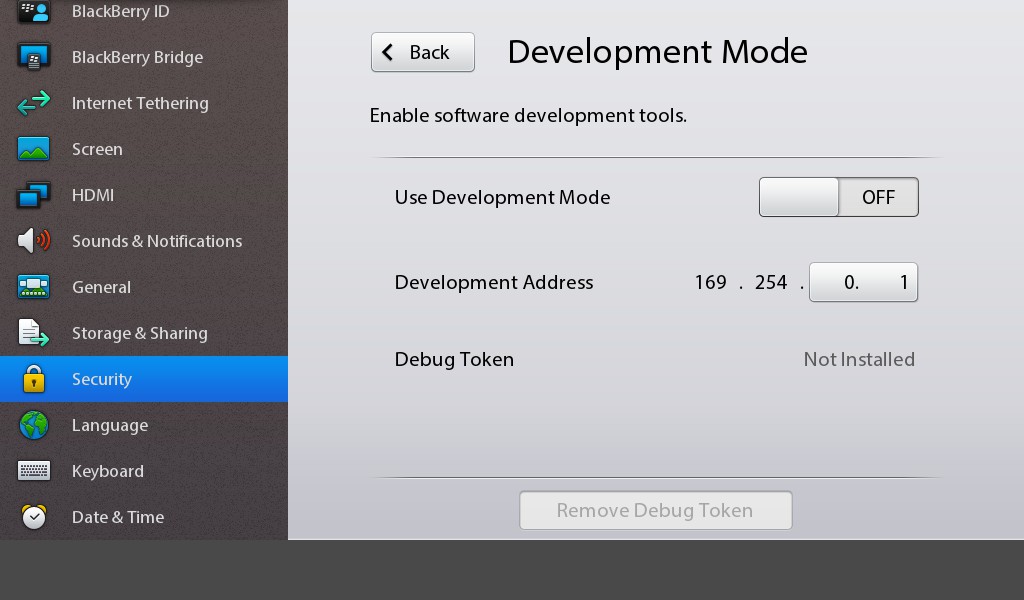
Enable your Playbook in Development Mode in Security > Development Mode from system preferences, and you will need to remember password which I suggest to be as simple as 123.
For Development Mode on your device, go to Security > Development Mode from system preferences. And set it ON. The following image shows Development Mode is OFF. Click the button to put it ON.
To sideload our App, we will use the easiest way of doing it, with the DDPB Installer. This small app lets you connect to your PlayBook, and install BAR files with just a few simple steps.
The installer has been updated with bug fixes and some other tweaks and now rests at version 1.0.9. The free utility is available for Windows from here.
Connect your PC to your Playbook with USB cable. Make sure Wifi of you Playbook is OFF. Run DDPB,and you will be greeted with following screen.

Add the bar file, you have just downloaded, by clicking the Add (A) button on top left of Installer, and click on the square next to app’s name, and the result will be as shown in the following image:

Now Scan to find the Playbook, clicking on Scan button on the left side of the Installer. Your Playbook’s IP will be found. Add Password you chose for Development Mode (I suggested before to be 123). Click the button Connect (C) and DDPB Installer will connect to your Playbook, and the result will be as shown:

I have blurred my Playbook’s PIN. Now you are ready to install the App. Click the button Install (I) and you will get a reassuring pop up saying that installation is completed.
Testing our Set up
Now check your Playbook and see if the App is installed. The folowing image shows Relay Network app duly installed at bottom right:

Our App’s name is Relay Network as I have already indicated. Click the app’s icon. You will see the following first screen:
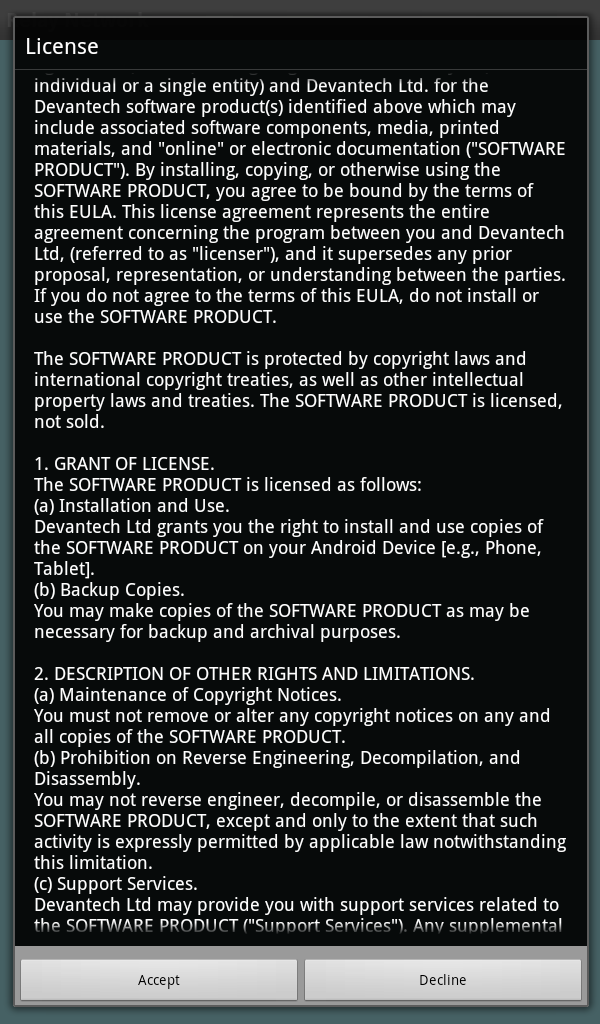
Accept the EULA Agremeent. Now you will see the following:

Click the button OK.
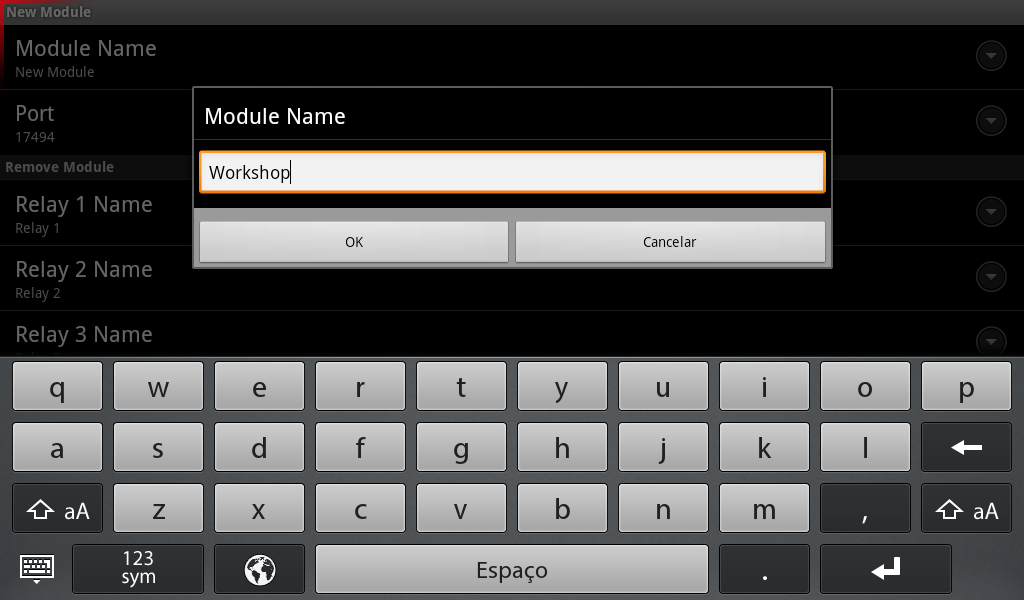
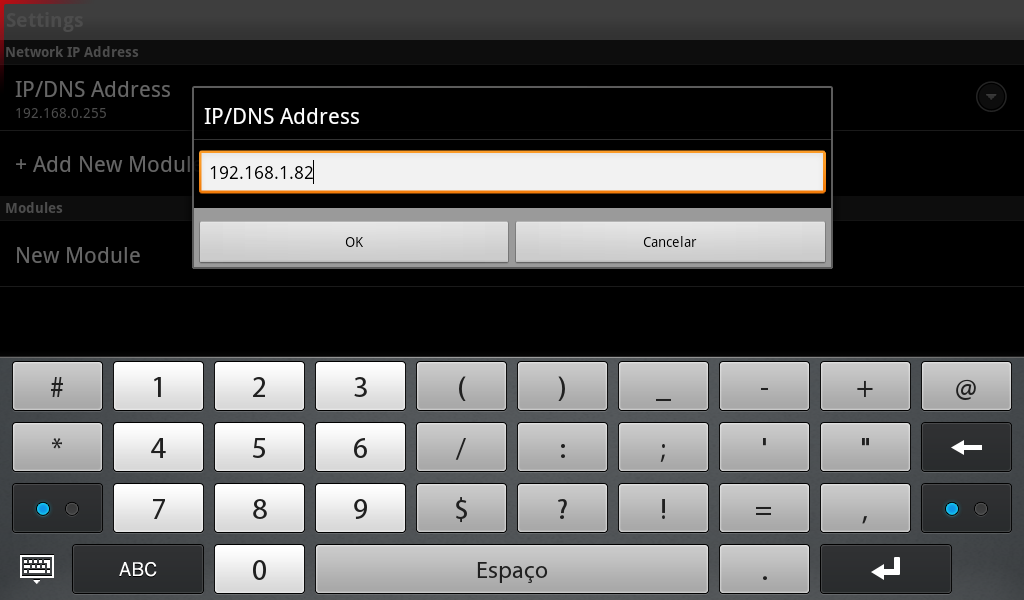
We will give the name Workshop to our Module. Click OK. We will now introduce the IP/DNS Address of our board. Ths was obtained when we tested the board in our PC.
Click OK. We will use default names Relay1 and Relay2. You can give the names you want for example “AC”, “Lights” etc. So now if we run our App and we will be greeted with:

Click Workshop button and you will see two large buttons:
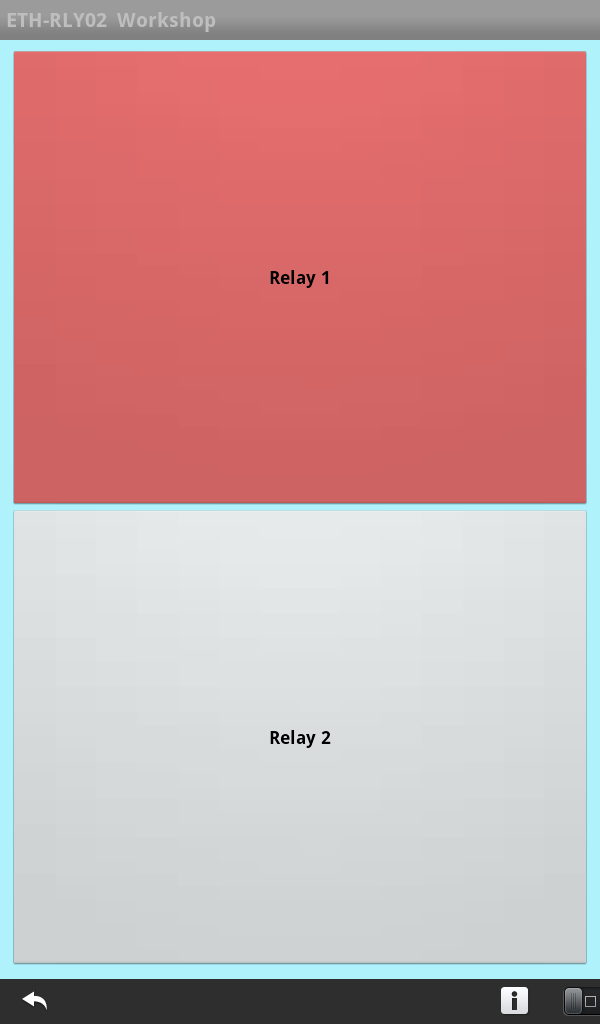
I have already pressed button Relay1 (the color changed to pink from grey). When you click any of the buttons, you will hear the clicking of Relay1 or Relay2 switching on or off.
There are screw terminals on the board where you can connect your external devices that you want to switch ON or OFF.
Caution: Do not connect any device to the ETH-RLY02 board if you do not what you are doing. Please check the circuit diagram, and right connections form Robot Electronics’ website.
Acknowledgements
A special thank you is due to Robot Electronics for the Relay Network board ETH-RLY02, and their excellent technical information for the board. My company ALIATRON sells two ETH boards.
Also I want to thank Louis Keeper for his DDPB Installer that facilitates installion of bar apps for Playbook.
A word of gratitude is due to Bitbucket for their free and unlimited repository where our App is lodged for download.
Finally and foremost a thank you also to owners of free online Playbook apk to .bar converter service, where I converted Robot Electronics’ Android apk to Playbook bar.
Conclusions
We have shown how easy it is to use Blackberry Playbook to control external devices. There is ground for improvement using ideas on the Robot Electronics’ website, such as fixing IP address of ETH-RLY02 board, controlling from outside theough Internet etc.
I will gratedul for any feedback from visitors, and anyone that implements this project, or makes any modifications.
