
Introduction
mbed is a platform for developing smart devices that are based on 32-bit ARM Cortex-M microcontrollers. It is designed to provide a highly productive solution for rapid prototyping and product development, with a focus on connected Internet of Things devices.
It is a project developed by ARM, its technology partners and a community of core developers, and it is used by tens of thousands of professional developers to create intelligent products that take advantage of the power of modern microcontrollers and connectivity. (Source).
The Freescale FRDM-KL25Z board is an ultra-low-cost development platform forKinetis L Series KL1x (KL14/15) and KL2x (KL24/25) MCUs built on ARM® Cortex™-M0+ processor. Features include easy access to MCU I/O, battery-ready, low-power operation, a standard-based form factor with expansion board options and a built-in debug interface for flash programming and run-control. The FRDM-KL25Z is supported by a range of Freescale and third-party development software, including mbed platform.
Objectives
This tutorial guides you through mbed-enabled Freescale Freedom FRDM-KL25Z board, and getting started with the mbed online tools platform. An mbed-enabled FRDM-KL25Z board gives you:
- USB drag and drop programming
- USB Virtual COM port for serial terminal
- CMSIS-DAP interface for programming and debugging from offline tools
- Free access to the mbed online compiler, mbed C/C++ SDK, and developer community
It is assumed from now on that you have a Freescale FRDM-KL25Z board and that it is already mbed-enabled.
It is really simple to setup and program, and it is free, so let us get started!
Procedures
1. Connect your mbed-enabled FRDM-KL25Z to your PC
Use the USB lead to connect your KL25Z to a PC, using the USB connector labelled OpenSDA.
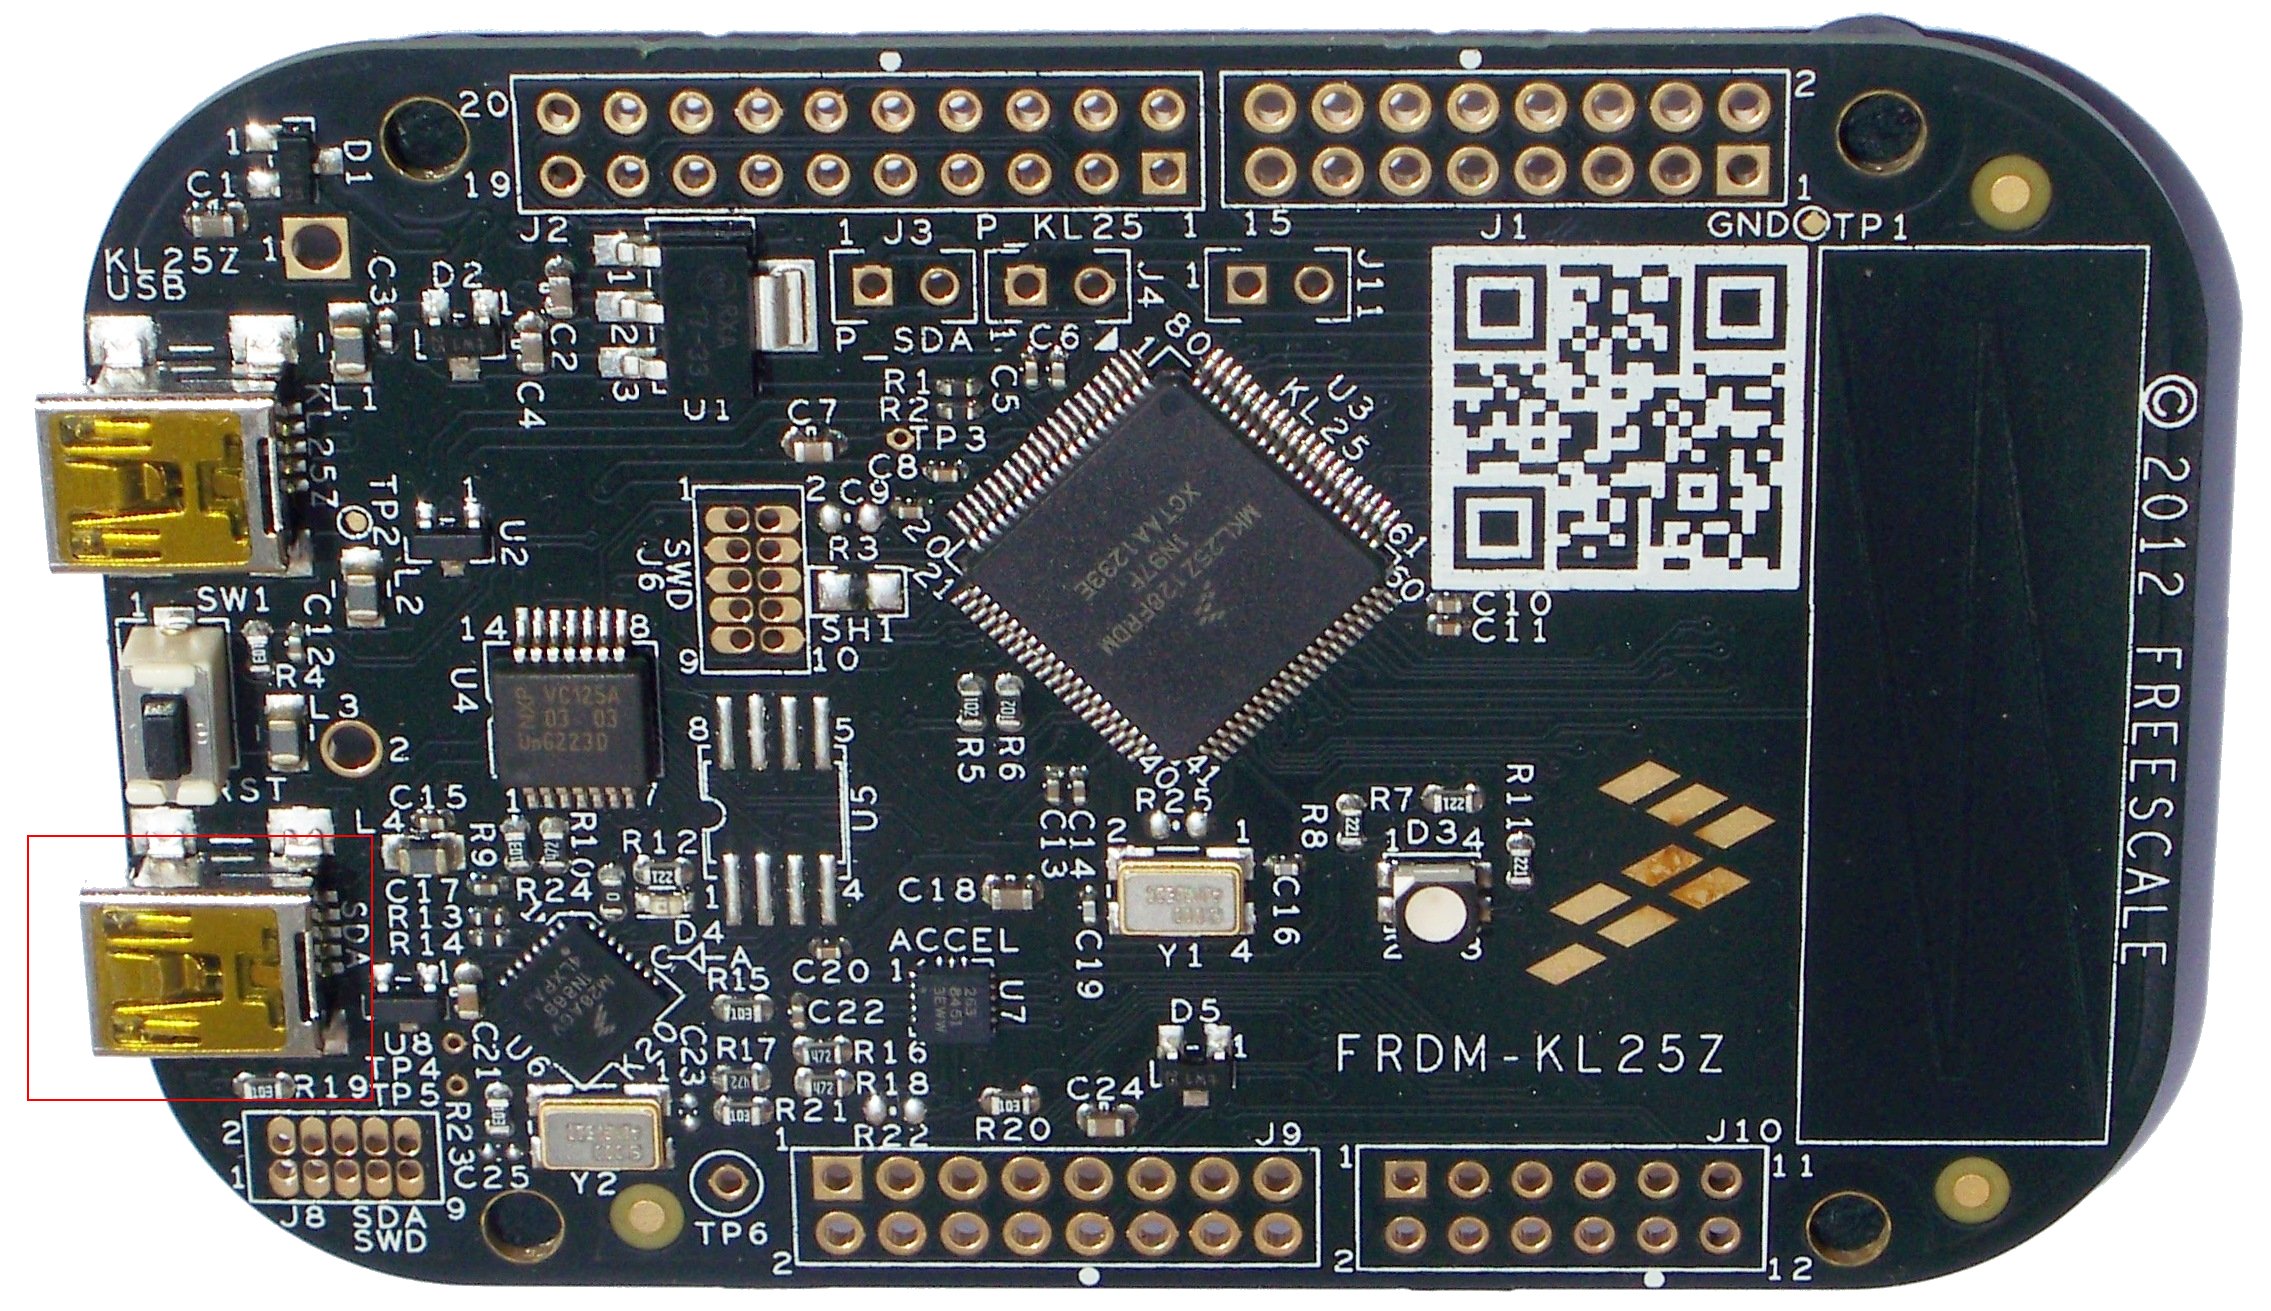
FRDM-KL25Z board. Red square shows poaition of OpenSDA USB connector
The status light will come on, indicating it has power. After a few seconds of activity, the PC will recognise the mbed Microcontroller as a standard USB drive. Also your PC will detect that a driver is needed.
2. Install the drivers in your PC
After your PC detecting the FRDM-KL25Z board, it will invite you to install drivers, Choose the second option of Advanced installation of driver as shown.
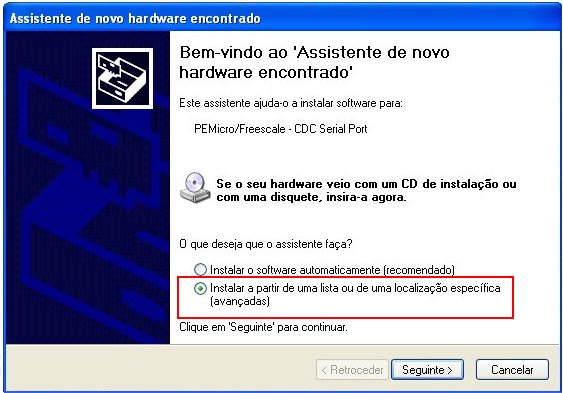
Windows’ requirement for a driver. The red rectangle shows Advanced installation
Note: This installation is under Windows XP in portuguese, your Windows will take you through similar procedures.
Click Next and choose to find the driver (by this time most certainly FRDM-KL25Z is recognised as a drive).
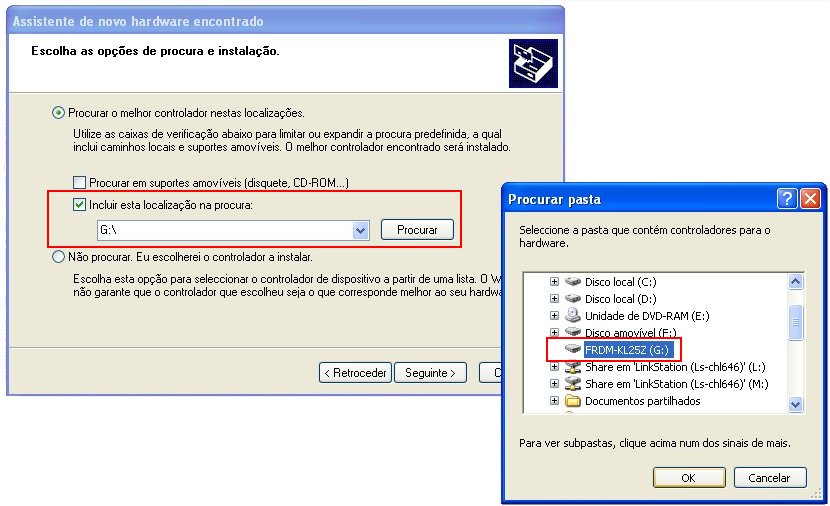
Red rectangles show the option to use a location and FRDM-KL25Z as drive
The required drivers are included in FRDM-KL25Z’s flash memory. Install the drivers, following all the normal steps of installation.
Install the drivers, following all the normal steps of installation.
NOTE: You may be warned that the driver is not officially recognised to be compatible with Windows. You will need to accept it as trustworthy.
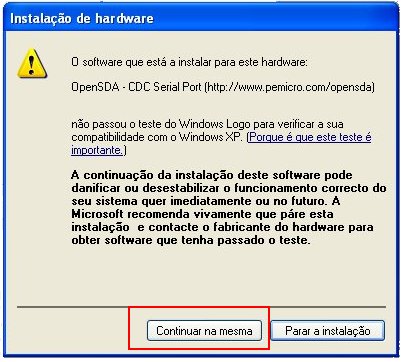
Warning of driver incompatability to be ignored
3. Visit the mbed website to get logged in and to compile
The URL for mbed website is:
If you do not have an mbed account, choose “Signup”, and create your mbed Account. Otherwise, log in with your normal username and password.
Login or signup at left corner of page
Login will give you access to the website, tools, libraries and documentation.
On top left of Home page you will see the menu where you will choose your platform by clicking on Platforms button.

Red rectangle indicates Platforms option of menu
Now choose the right Platform that for this case is FRDM-KL25Z, by clicking on this option.
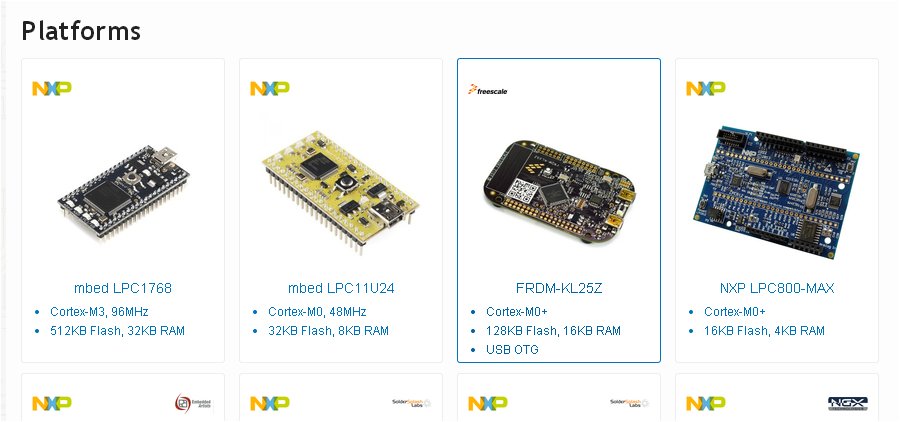
Blue rectangle indicates Platform option to be chosen for FRDM-KL25Z
Having chosen the Platform, you will now add your FRDM-KL25Z board to your Compiler.

Red rectangle shows the option to be chosen for adding the board
After adding the board to the Compiler you are ready to compile your first code.
4. Open the mbed Compiler
Open the online Compiler clicking the Compiler button in the site menu (top-right of the page). This will open the Compiler in a new tab or window.
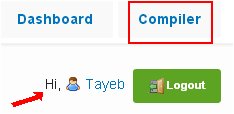
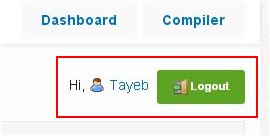
Red rectagnle shows the option to be chosen, and red arrow shows already logged in
NOTE: It will be your chosen name that will appear as logged in, obviously!
5. Write a New Program
To create a new program in your personal Program Workspace:
- Right-click on My Programs, and select New Program…

Adding “New Program…” in Program Workshpace
- Enter the name of the new program (e.g. “HelloWorld”), and click OK
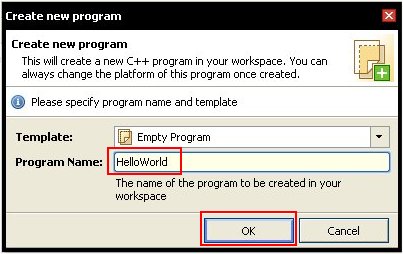
Pop up window to create new program name
Your new program folder will be created under My Programs
6. Add a source code to the program
Add a new file by right clicking on HelloWorld program name.
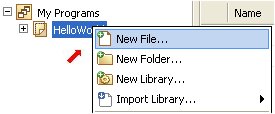
Adding “New File…” to “HelloWorld” program name
- Enter the name of the new file main.cpp and click OK.
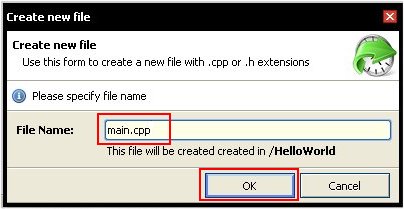
Pop up window to create new file name
After adding new file, click on the main.cpp file in your new program, to open it in the file editor window. This is the main source code file in your program, and by default it is empty. Write the following program.
#include "mbed.h"
DigitalOut myled(LED1);
int main() {
    while(1) {
        myled = 1;
        wait(0.2);
        myled = 0;
        wait(0.2);
    }
}
The result will be as shown:
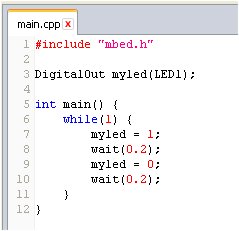
Code in main.cpp file
- Adding mbed library to the program folder
The other item in the program folder is the mbed library – this provides all the useful functions to start up and control the mbed Microcontroller, such as the DigitalOut interface used in this example. Right-click on HelloWorld, choose Import Library… and From Import Wizard…
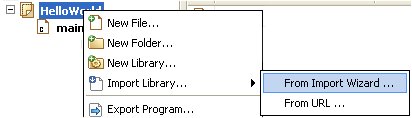
Import library wizard
Now choose mbed library and then click on Import button on the top right-side.
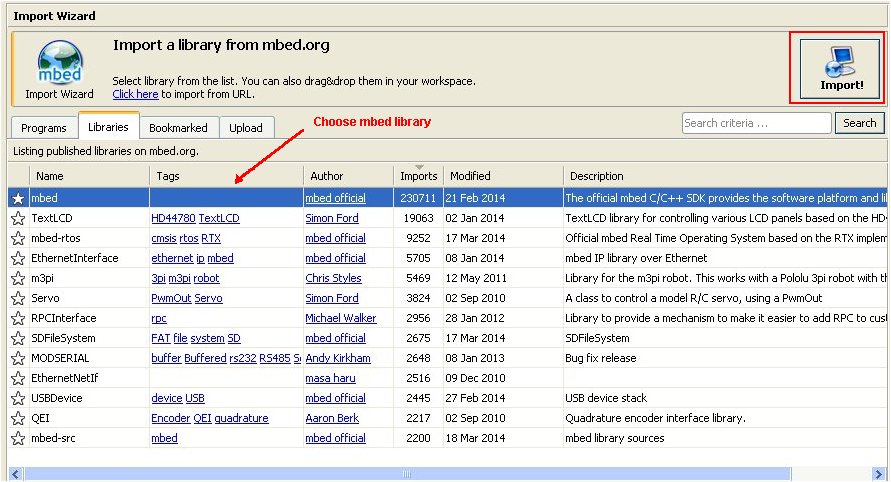
Import mbed library
Program Workspace will show that mbed library has been added to HelloWorld program.
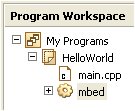
Program Workspace with HelloWorld and main.cpp file and mbed library
In our main.cpp file LED1 stands for red colour LED on the FRDM-KL25Z. Before proceeding any further, make changes to second line at the end of DigitalOut command, substituting LED1 with LED3. On the right-side of editor you will see the Enumerator telling you that LED3 corresponds to blue LED on FRDM-KL25 RGB LED.
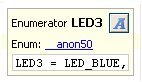
LED3 enumerator indicating what it corresponds to
Our main.cpp file’s content will be now:
#include "mbed.h"
DigitalOut myled(LED1);
int main() {
    while(1) {
        myled = 1;
        wait(0.2);
        myled = 0;
        wait(0.2);
    }
}
Before proceeding save main.cpp file by right-clicking on it, and choosing the option Save…
7. Compile and Download the Program
To compile the program, click the Compile button in the top toolbar.

Compile button
This will compile all the program source code files within the program folder to create a binary program.
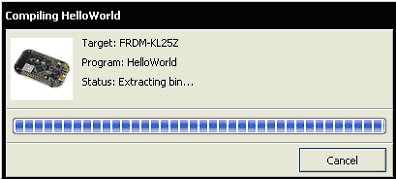
Compiling “HelloWorld” program
- After a successful compile, you will get a Success! message in the compiler output and the download dialog will pop up to Save the binary program, or it will be automatically downloaded to your default Downloads folder.
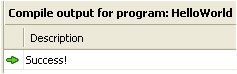
Compiler output for “HelloWorld”
- Save it to the location of your PC in case of download dialog pop up.
NOTE: In Goggle’s Chrome browser, the compiled file will be downloaded to Downloads folder.
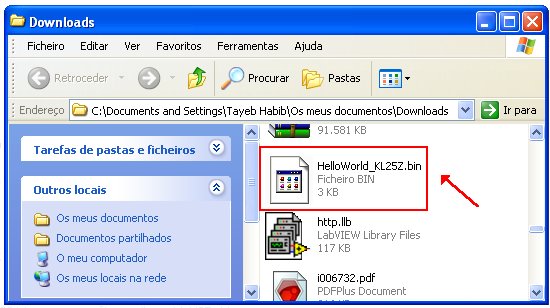
Compiler output for “HelloWorld” in Downloads folder of PC
NOTE: If there are errors, they will show up in the “Compiler Output” window, and will need to be fixed!
- FRDM-KL25Z behaves a drive, so you find it in My Computer of your PC.

FRDM-KL25Z as a drive in My Computer
- Cut, or drag, the HelloWorld_KL25Z.bin file in your PC’s Downloads folder and paste, or drop, in the mbed Microcontroller folder, wait a few seconds for the drive folder to close automatically, and then hit reset on the microcontroller to start it running!
If everything goes well, FRDM-KL25Z is programmed and the blue LED on RGB LED on FRDM-KL25Z will blink!
Main source of this tutorial is mbed.org website, specially the Handbook section at: https://mbed.org/handbook/mbed-FRDM-KL25Z-Getting-Started
See also:
And an enormous wealth of information on mbed’s website!

Pingback: Temperature measurement with Freescale FRDM-KL25Z and TCN75A on Digilent Basic I/O shield | RedAcacia
Pingback: Remote Viewing of Temperature with FRDM-KL25Z and TCN75A on Basic I/O Shield | RedAcacia
what is the code for hcsr 04 sensor detection with frdm kl25z
No idea. It should not be that complicated.